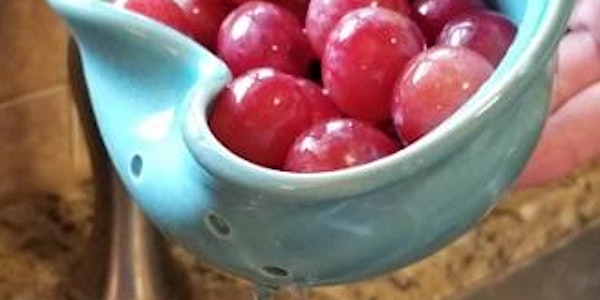
Make a berry cauldron pottery wheel in Oakville, Bronte Harbour
Introduction to pottery. No experience needed. Includes up to 30 minutes on the wheel, additional time for handbuilding.
Location
Artventures Oakville
2393 Lakeshore Rd. W. Second Floor (use Jones 103 Entrance) Oakville, ON L6L 1H5 CanadaRefund Policy
About this event
Please email ArtventuresStudios.com or text 716-244-2074 to request alternate times/dates.
To make a berry cauldron on a pottery wheel, you will need some basic pottery tools and materials. Here's a step-by-step description of the process:
1. Prepare the clay: Start by preparing the clay. Choose a clay body suitable for wheel-throwing, such as stoneware or porcelain. Wedge the clay thoroughly to remove any air bubbles and ensure it's pliable and consistent in texture.
2. Centering the clay: Take a portion of the clay and place it on the center of the pottery wheel head. Use your hands to firmly press the clay down while the wheel is spinning at a moderate speed. Apply gentle pressure and gradually increase it until the clay is perfectly centered.
3. Opening the vessel: With your hands wet, create a depression in the center of the clay by gently pushing your thumbs into the clay. Start at the center and gradually move your hands outward to create a conical shape.
4. Shaping the walls: Begin raising the walls of the cauldron by applying even pressure with your hands and fingers on the inside and outside of the clay. Slowly lift the walls upwards, maintaining an even thickness. Use your fingertips to smooth out any uneven areas and refine the shape.
5. Creating the berry shape: Once you have the basic shape of the cauldron, it's time to add the berry details. Using a wooden or metal rib tool, carefully press into the clay near the top rim of the cauldron, creating indentations that resemble the texture of berries. You can experiment with different sizes and arrangements to achieve the desired effect.
6. Trimming and finishing: Once you're satisfied with the shape and texture, carefully trim the excess clay from the bottom of the cauldron using a sharp trimming tool. Smooth and refine the bottom edge for a clean finish. You can also add any additional decorative elements or handles, if desired.
7. Drying and firing: Allow the cauldron to dry completely to a leather-hard stage. This can take a few days to a few weeks, depending on the moisture content and ambient conditions. Once dry, you can bisque fire the cauldron in a kiln to remove any remaining moisture and strengthen the clay.
8. Glazing and final firing: After the bisque firing, apply glazes of your choice to the cauldron. The glazes can be selected to match the colors of berries or be creatively chosen for a unique effect. Apply the glaze according to the manufacturer's instructions, ensuring even coverage. Finally, fire the cauldron in a kiln to the recommended temperature for the glaze you've chosen.
9. Finishing touches: Once the cauldron has cooled down, inspect it for any rough spots or imperfections. Use sandpaper or a sponge to smooth out any rough edges. You can also apply a clear glaze or wax to add shine and protection to the surface if desired.
And there you have it! A berry cauldron made on a pottery wheel. Remember to always follow proper safety procedures and consult with an experienced pottery teacher or studio for guidance, especially if you're new to pottery. Happy creating!